Get started with Pryv.io API
In this tutorial, we will help you to get started with Pryv.io. You can try out and evaluate the Pryv.io API for your projects using either our Lab platform or the Open source version of Pryv.io available here.
We will guide you through:
- Create a Pryv Lab user
- Create an Open Pryv.io user
- Obtain an Access Token
- Data Modelling
- Access Management
- What is next?
In addition, you can download the OpenAPI document describing the Pryv.io API using the OpenAPI Specification and import it on other testing platforms for API such as Postman, as explained on our Open API page.
Create a Pryv Lab user
By registering on our Lab platform, you will have access to a Pryv.io user account in a fully-functional environment perfect for your first tests.
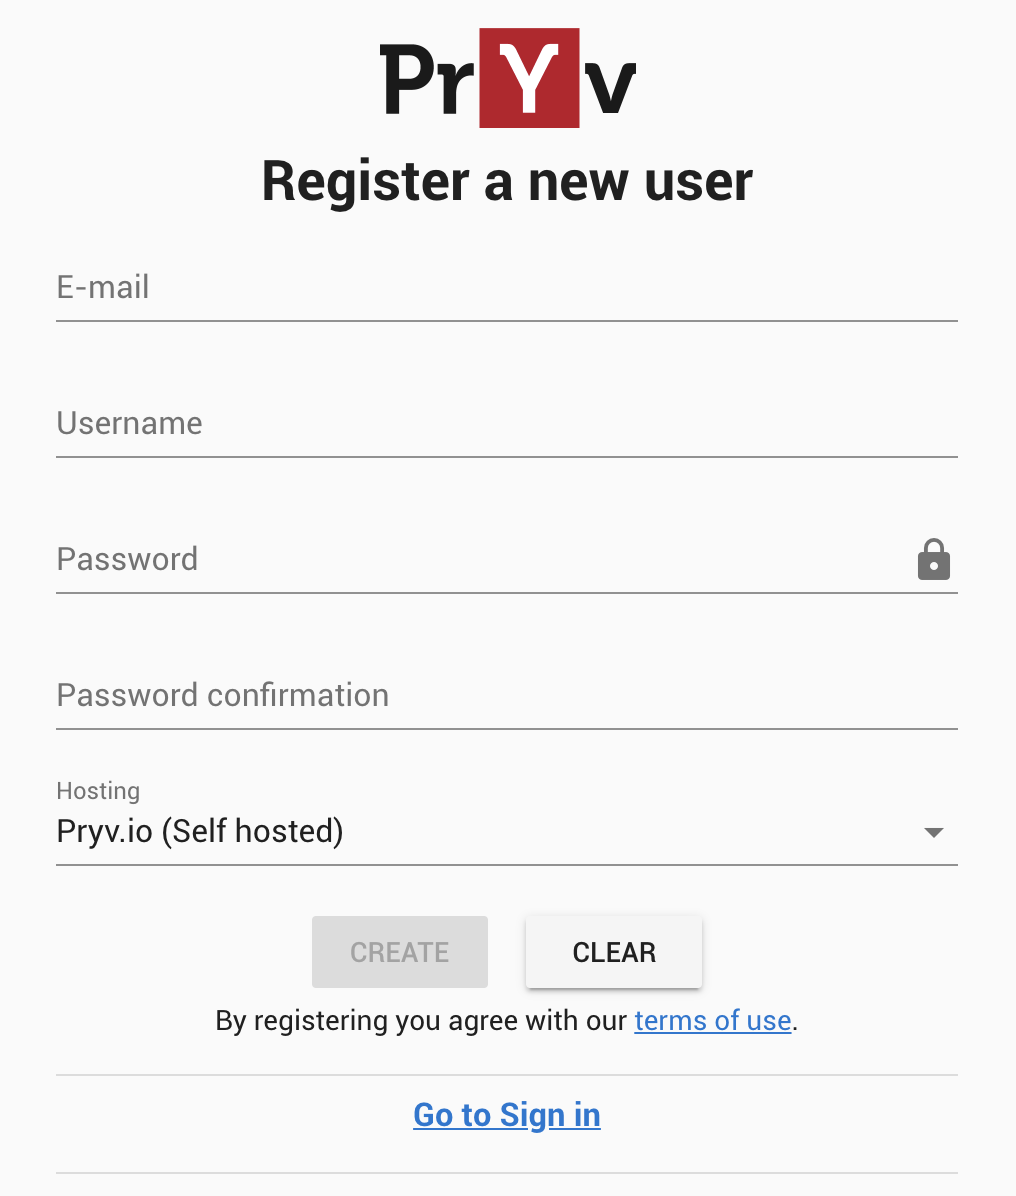
- Go to the registration page.
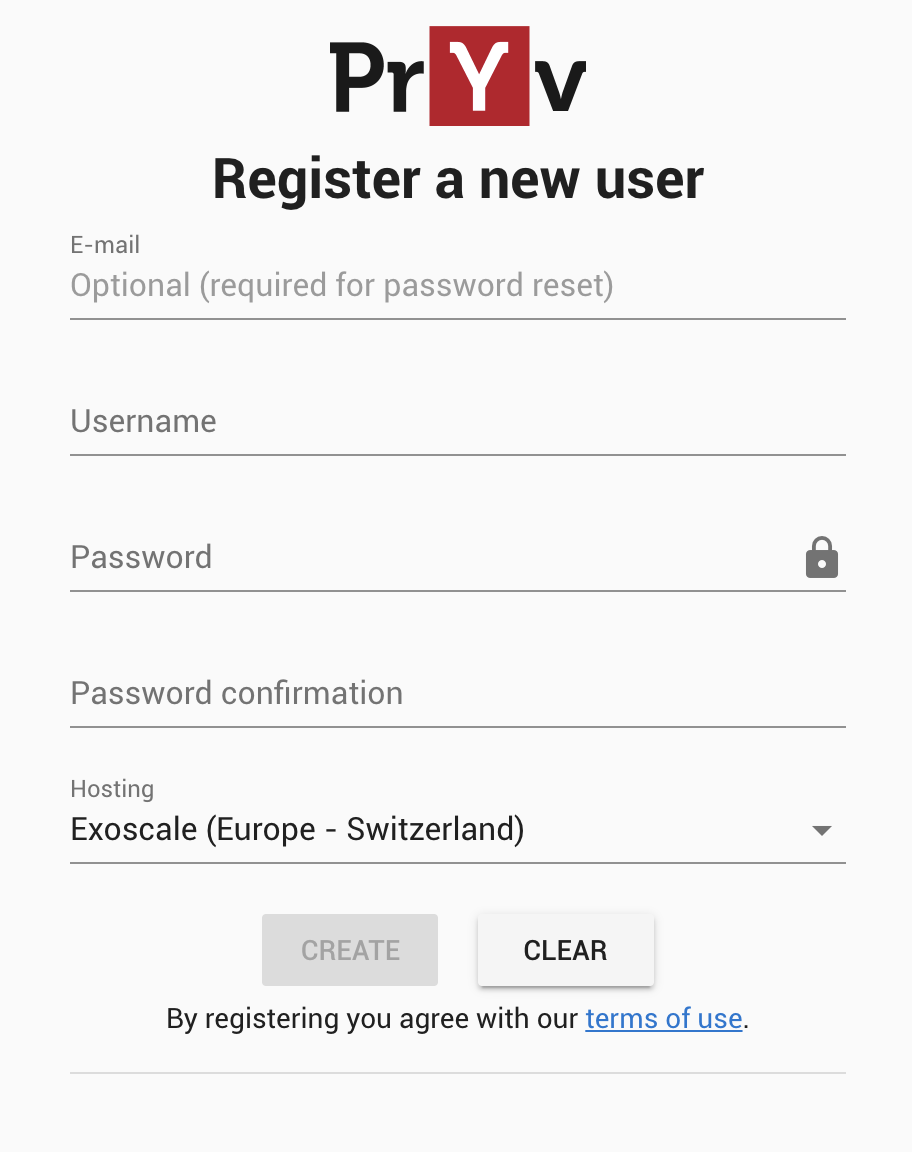
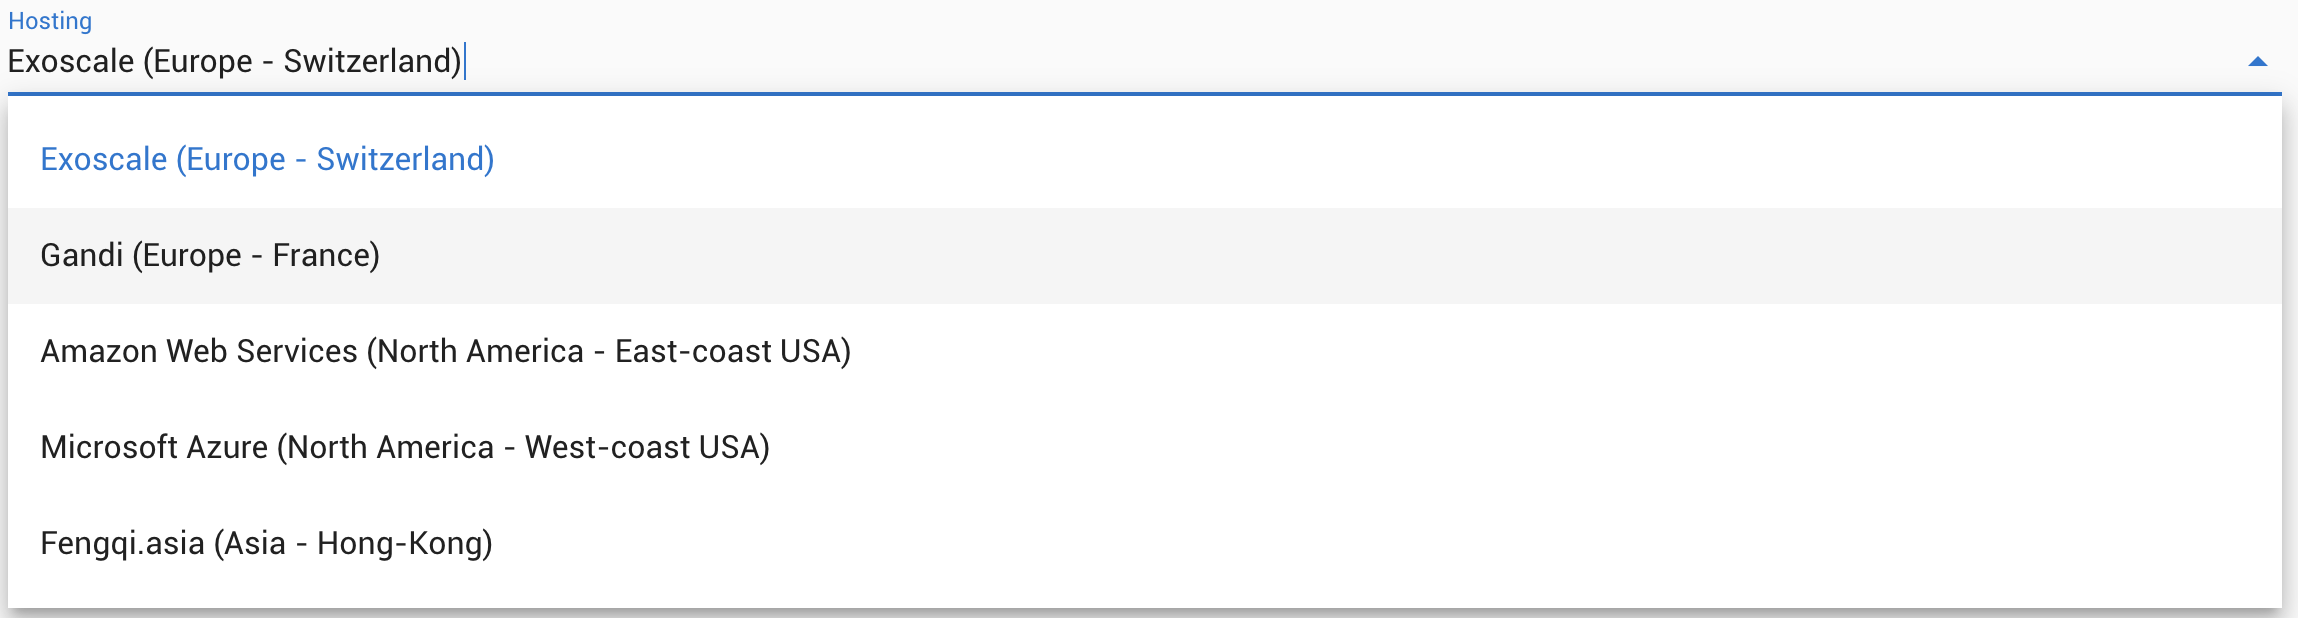
- Fill in the form and choose where you want to store your data under ‘Hosting’.
- Click on the ‘Create’ button.
Data in Pryv.io has a geographical location that doesn’t change. This makes it easier to control what legislations apply.
Note that the email is optional for the account creation, but is required to reset your password.
Once this is done, you will receive a welcome email from the Pryv Lab with your account details.
You can sign in to your Pryv.io account on the following link: https://sw.pryv.me/access/access.html.
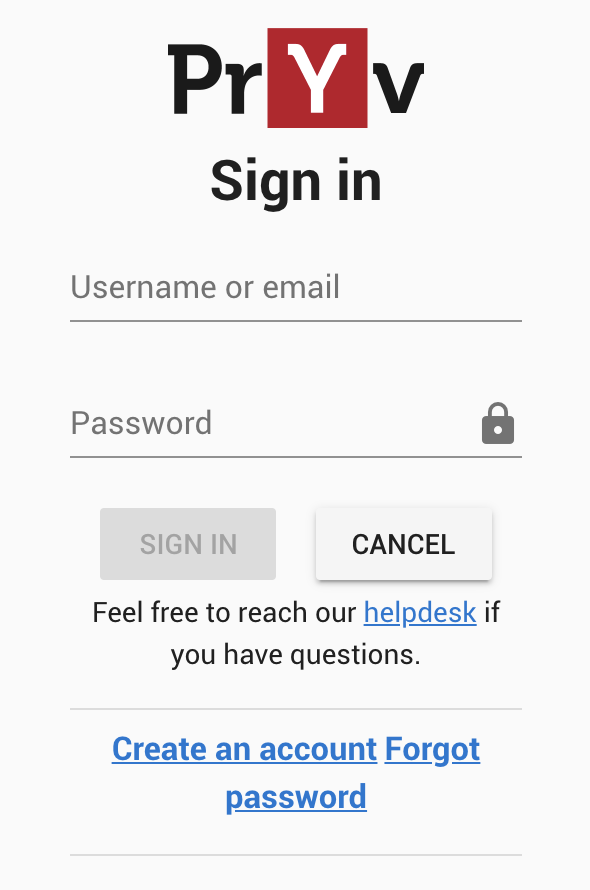
You have now access to your Pryv Lab account through the Pryv.io demo dashboard web application.
Pryv demo Dashboard
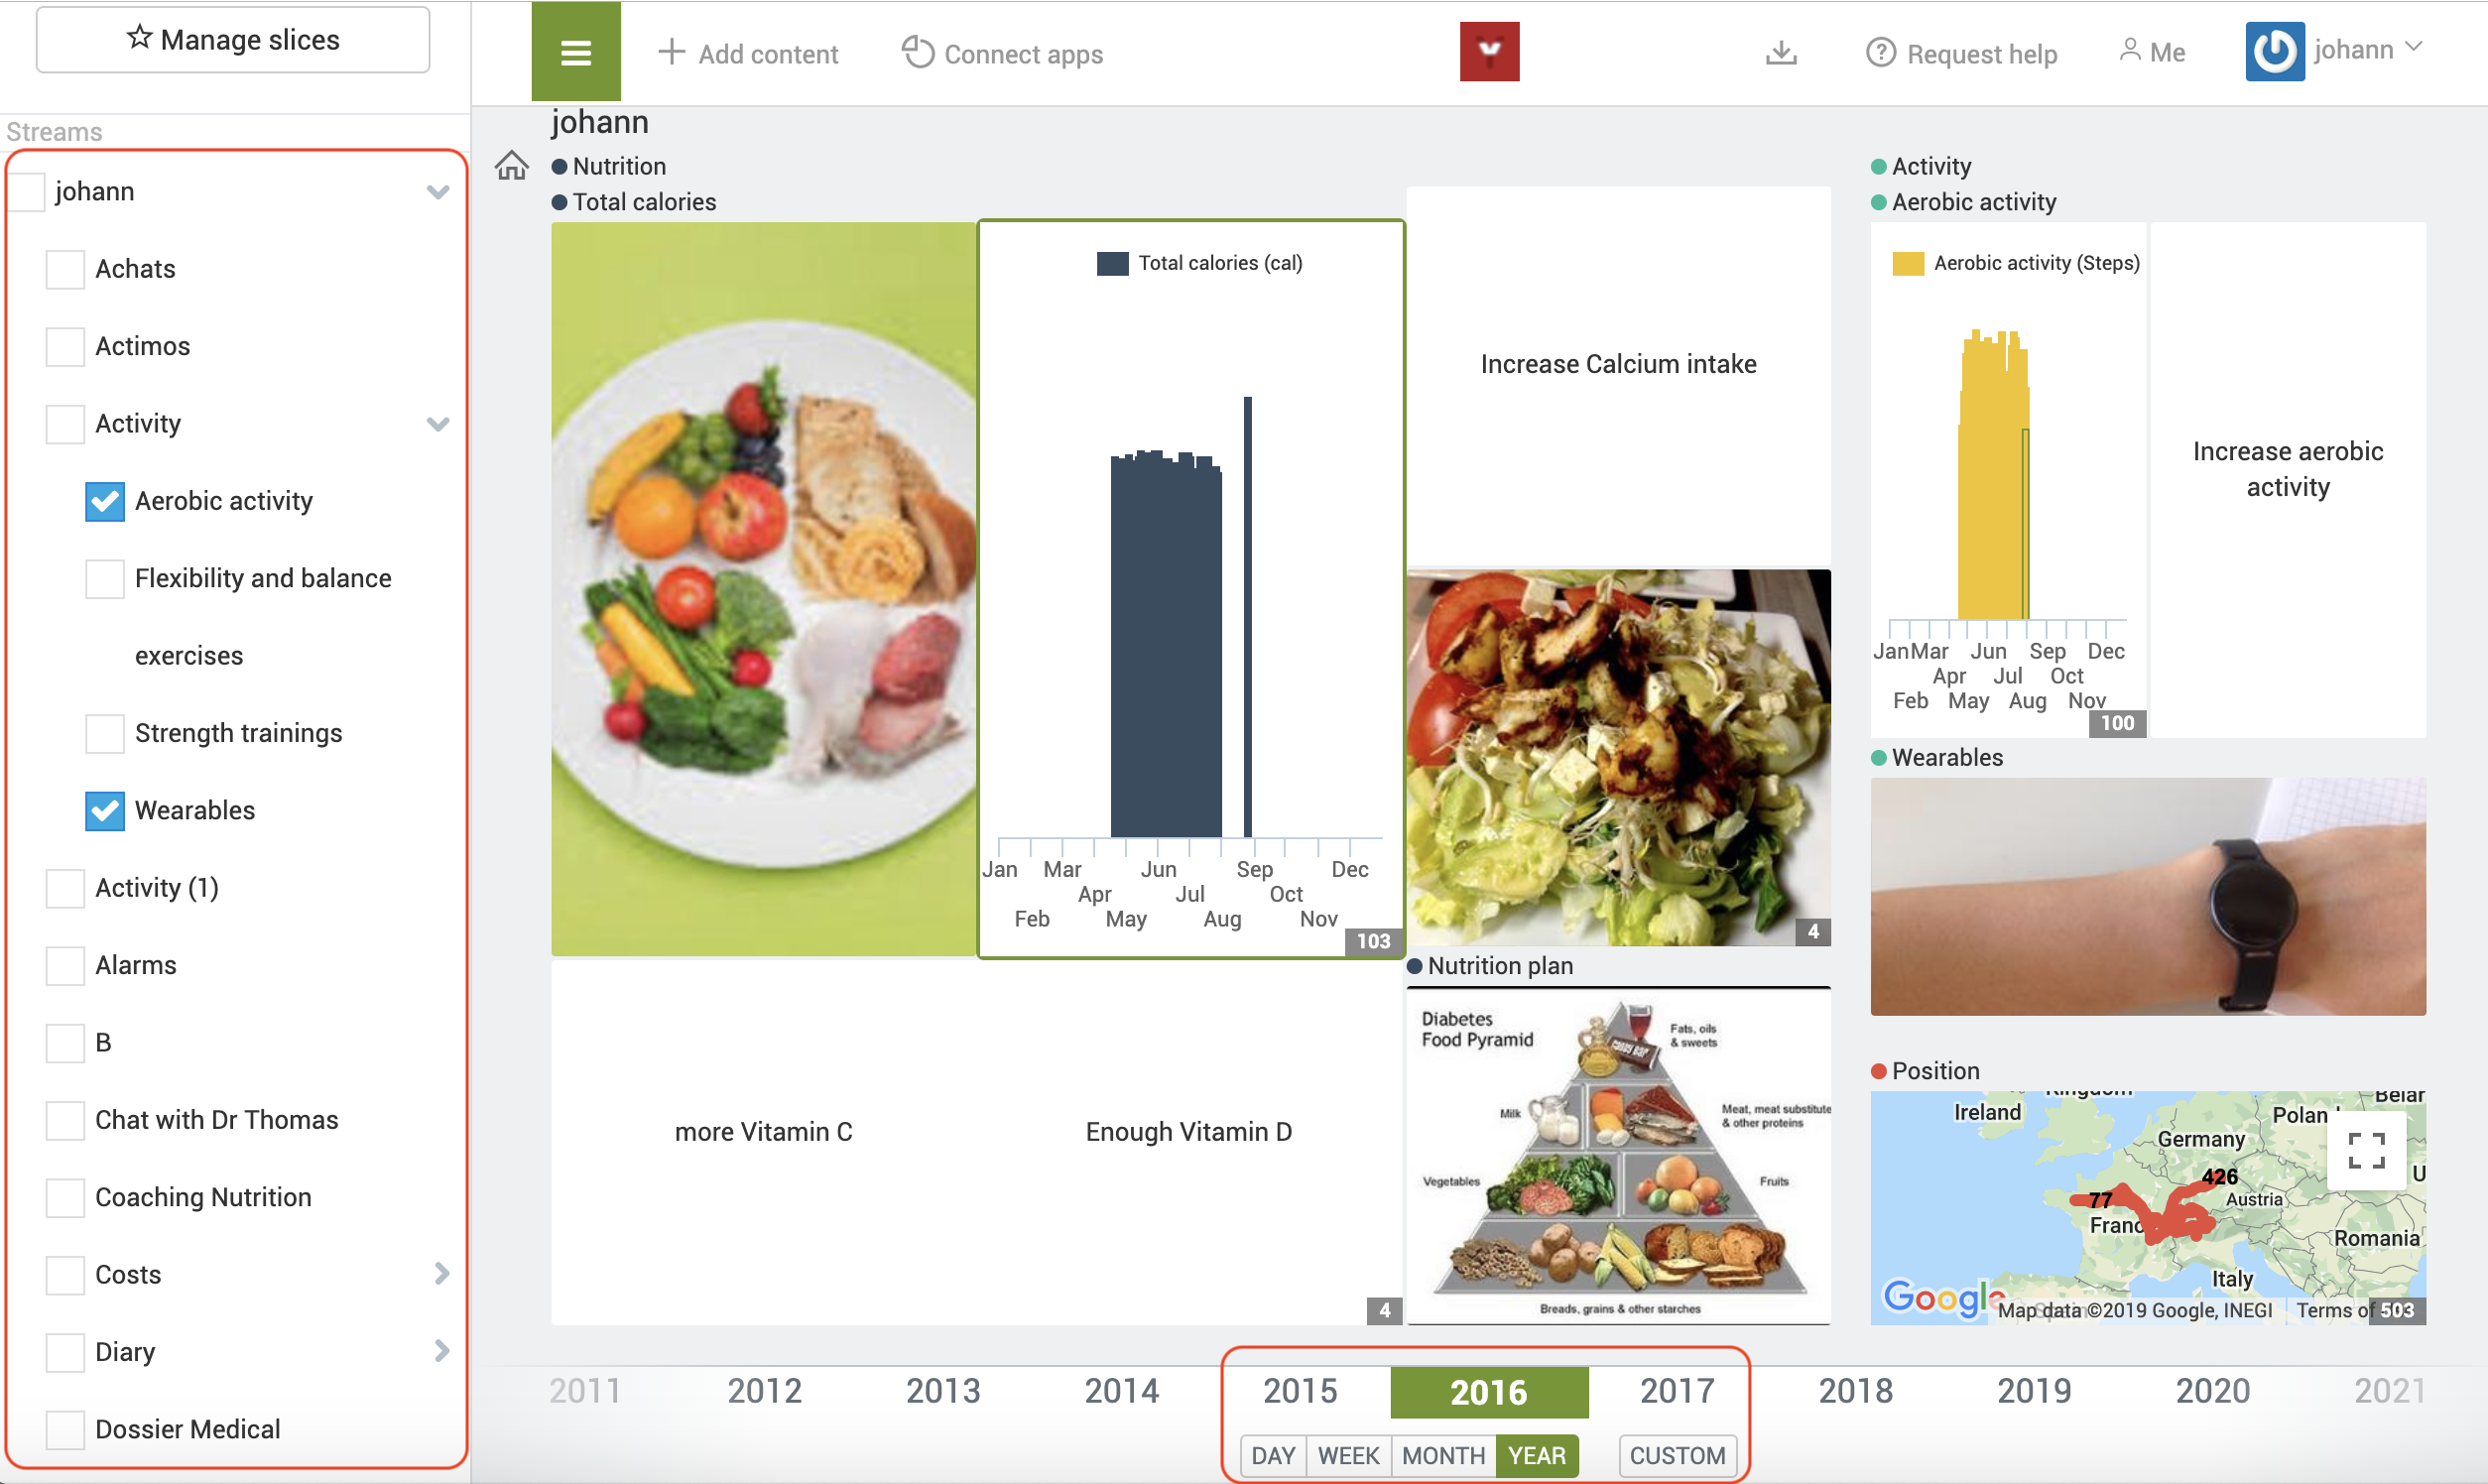
The Pryv demo dashboard is a data visualization tool.
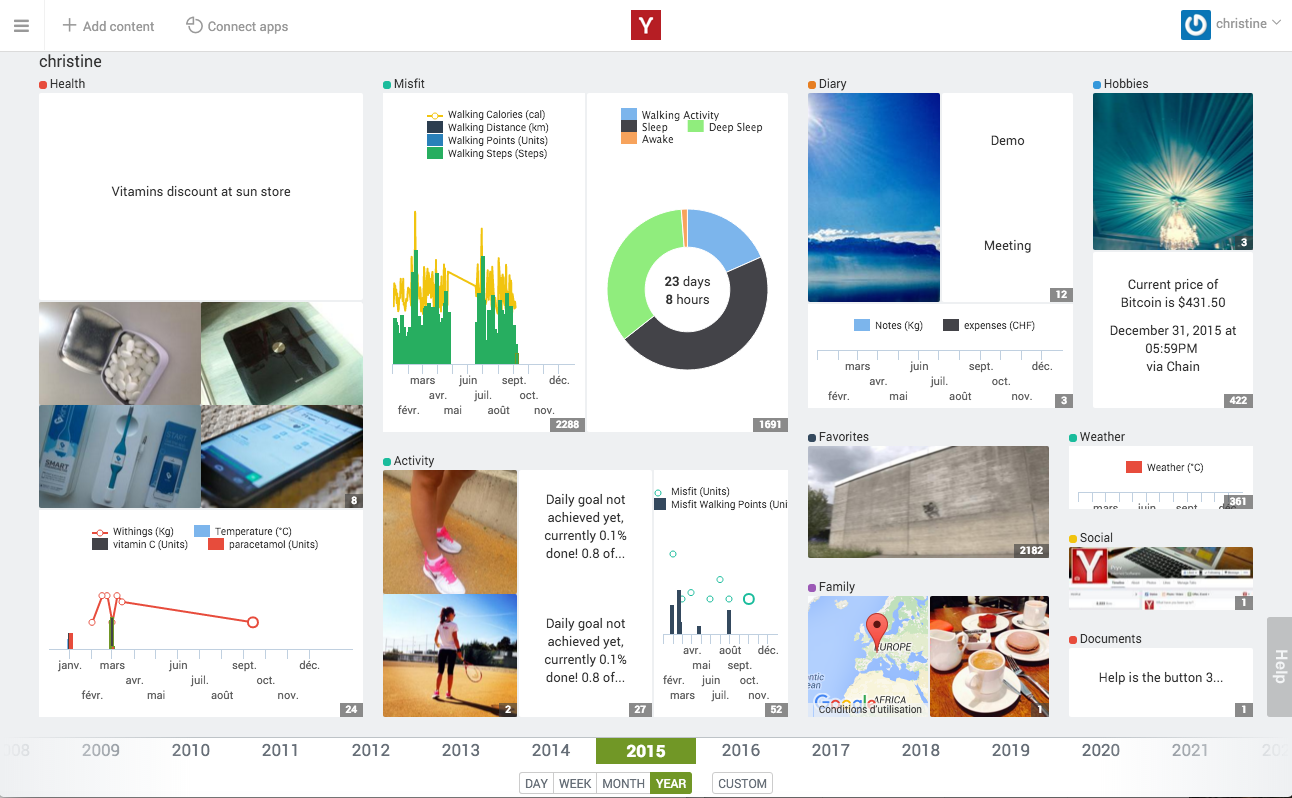
It enables you to visualize the “events” you created, corresponding to timestamped data - that can be in the form of notes, images, GPS location, data points, etc - and to organize them into “streams”, while managing the access level to this data. To get more information on the Pryv data model of events and streams, you can jump to the dedicated chapter.
The dashboard offers a visual display of the data you will create and add to your account throughout this guide.
As shown below, once you connect to your account, the home page of your dashboard displays the list of streams of your account, where a default stream Diary is automatically created.
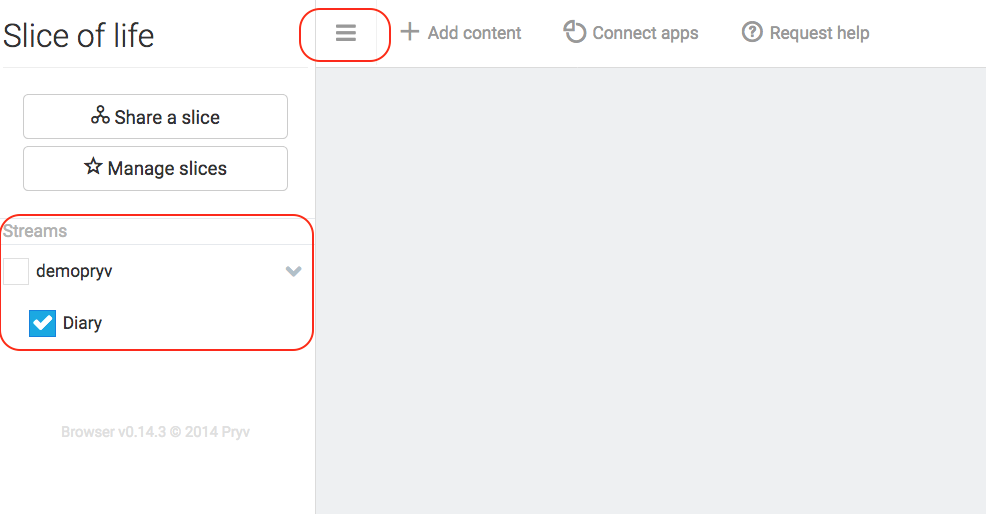
You can easily add content (notes, pictures, positions) directly from the dashboard and select in which stream to put it. Once data is added to your account, you can select which streams to visualize on the dashboard and which time period to display by using the scroll bar on the bottom of the dashboard.
Create an Open Pryv.io user
You should first setup the installation of your own Open Pryv.io platform by following the guidelines in the README of the Github repository.
Once your platform is up and running, you can create a user account and launch the authentication process.
- Launch your Open Pryv.io locally
- Open the registration page on the following link : https://my-computer.rec.la:4443/www/access/register.html.
3. Fill in the form and click on the '**Create**' button.
Obtain an Access Token
Now that your Pryv.io account has been created using either Pryv lab or Open Pryv.io, you can start adding data. In order to do so by using code or API clients such as cURL or Postman, you first need to obtain an access token.
The easiest is to use the Pryv Access Token Generation page (which is a raw implementation of Pryv.io’s oAuth-like process).
-
Go to the Pryv Access Token Generator.
-
Set up the required parameters :
- Fill in the Service Info URL related to your Pryv.io platform:
- with Pryv Lab

- with Open Pryv.io

- Enter the Application ID (ex.:
app-web-access-test) - Setup the streams you want to grant access to in the permissions box
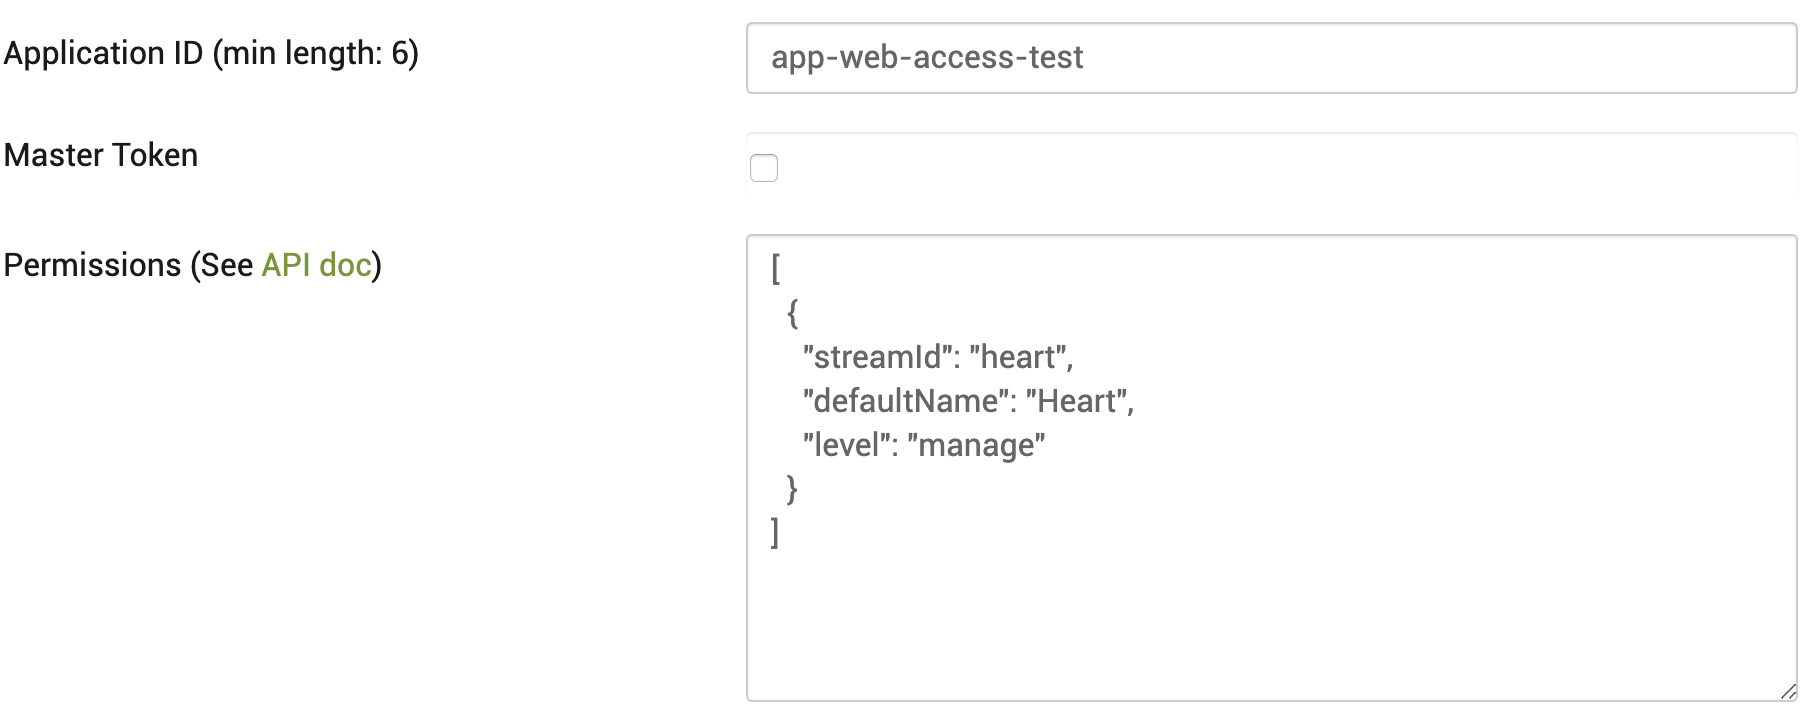
[ { "streamId": "heart", "defaultName": "Heart", "level": "manage" } ]- Click on the ‘Request Access’ button
-
After requesting access, you can click on the ‘Login’ button that appears
A new tab will open to log in to your Pryv Lab or Open Pryv.io account
-
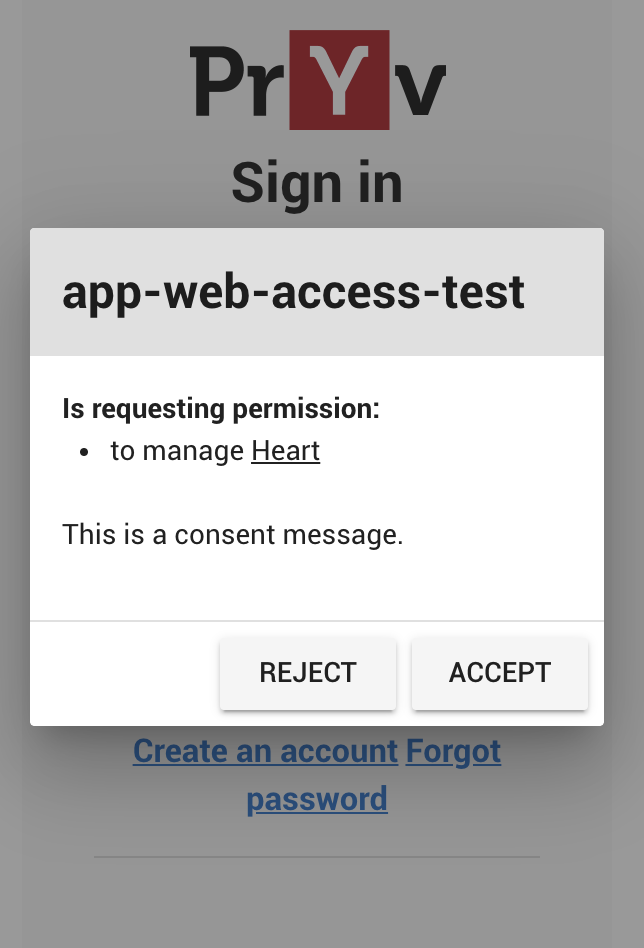
Sign in with your Pryv Lab or Open Pryv.io credentials
By accepting, you consent that the ‘app-web-access-test’ application can access the stream Heart with a “manage” access level. Since this stream doesn’t exist yet, it will be automatically created and carry the name we provided in the defaultName parameter above.
For now, you just have to understand that we are generating a token that gives enough permissions to interact with our Pryv.io account in the scope of our example. You will learn more about accesses in the Access Management chapter.
Data Modelling
In this section, we provide you information on the basic concepts of the Pryv.io data model. When adding data to your account, you need to comply with Pryv’s conventions by organizing it into “streams” and “events”.
To see examples and possible scenarios you might encounter, please check the dedicated page to learn how the data model should be structured and implemented depending on your use case.
The Pryv.io data model is composed of two entities: events and streams.
All the data that you collect and aggregate should follow an organisation in streams and events. Inside each stream can be found timestamped events :

Streams
Streams are the main way of encoding context for events and are organised in a hierarchical way. They can have sub-streams and usually correspond to organizational levels for the user (e.g. life journal, blood pressure recording, etc.) or encode data sources (e.g. apps and/or devices).
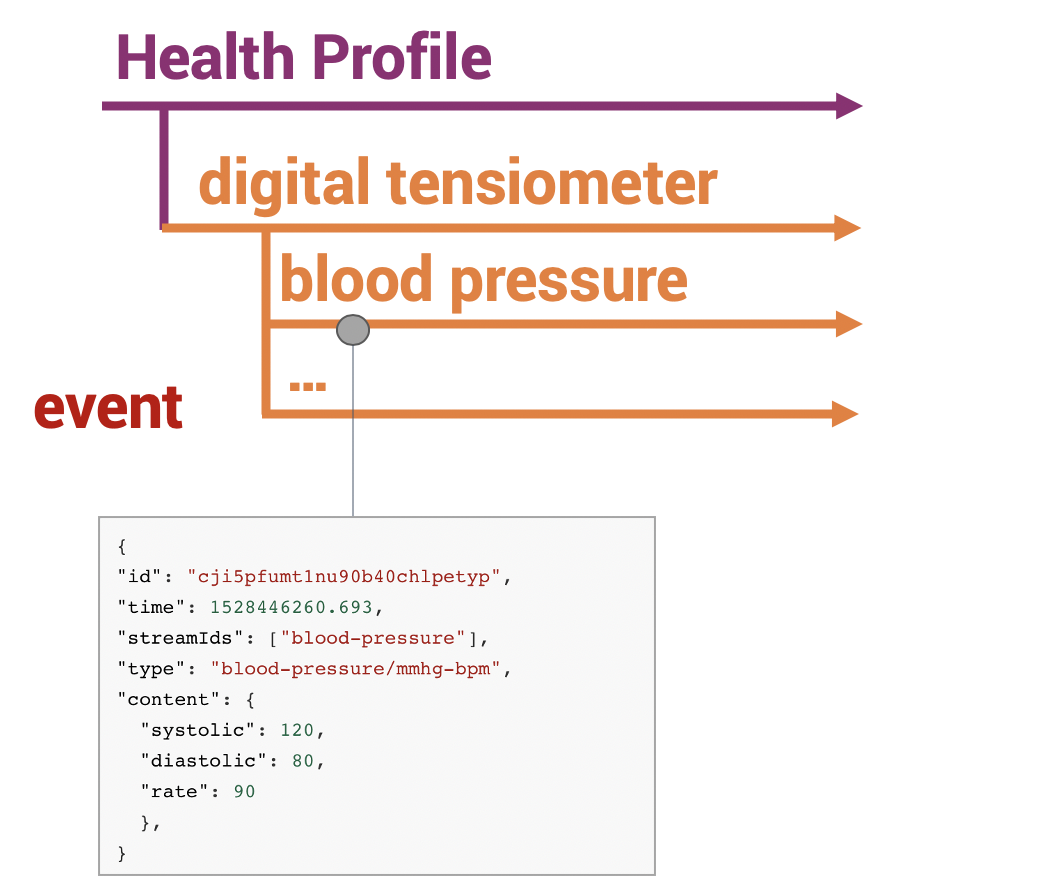
Here is an example of a stream with sub-streams (children): the Digital Tensiometer has a dedicated substream, which collects “events” such as the blood pressure measurements and adds them in the substream blood-pressure.
{
  "id": "health-profile",
  "name": "Health Profile",
  "parentId": null,
  "created": 1528445539.785,
  "createdBy": "cji5os3u11ntt0b40tg0xhfea",
  "modified": 1528445581.592,
  "modifiedBy": "cjhagb5up1b950b40xsbeh5yj",
  "children": [
    {
      "id": "digital-tensiometer",
      "name": "Digital Tensiometer",
      "parentId": "health-profile",
      "created": 1528445684.508,
      "createdBy": "cji5os3u11ntt0b40tg0xhfea",
      "modified": 1528445684.508,
      "modifiedBy": "cji5os3u11ntt0b40tg0xhfea",
      "children": [
        {
          "id": "blood-pressure",
          "name": "Blood Pressure",
          "parentId": "digital-tensiometer",
          "created": 1528445704.807,
          "createdBy": "cji5os3u11ntt0b40tg0xhfea",
          "modified": 1528445704.807,
          "modifiedBy": "cji5os3u11ntt0b40tg0xhfea",
          "children": []
        }
      ]
    }
  ]
}
Events
Events are the primary unit of content in Pryv.io. An event is a timestamped piece of typed data, and always occurs in at least one stream. Events either have a type from the list of standard event types to allow interoperability, or an application-specific type.
Our user will therefore be adding events of different types, each related to specific streams:
Here’s an example of an event, corresponding to the heart rate collected by a Digital Tensiometer and added in the substream heart as described in the streams structure above :
{
  "id": "cji5pfumt1nu90b40chlpetyp",
  "streamIds": ["heart"],
  "type": "blood-pressure/mmhg-bpm",
  "content": {
    "systolic": 120,
    "diastolic": 80,
    "rate": 90
  },
  "time": 1528446260.693
}
Pryv offers the possibility to manipulate a broad range of event types that can be all found in the event type directory. You can also create your custom event types for your own use case as explained in this Github repository.
Basic event types include :
- numerical values to capture number values. For example, the type
density/kg-m3can be used to record the density of a material. In the case of our user, we can use this type to reflect the exposure to specific allergens in his daily life.
{
  "id": "c3jkdjdt000ze64d8u9z4hap",
  "streamIds": ["pollen"],
  "type": "density/kg-m3",
  "content": 850,
  "time": 1589358119.329
}
- complex types, which will be relevant for specific activities and measurements. In the use case above, the type
blood-pressure/bpm-mmhgcan be used to record a blood pressure measurement. It will represent an object, the blood pressure measurement, that has three properties : the systolic and diastolic blood pressure stored in mmHg, and the heart rate in bpm.
{
  "id": "c4jghrjkj011ez46d8u4y3pah",
  "streamIds": ["heart"],
  "type": "blood-pressure/bpm-mmhg",
  "content": {
      "systolic": 120,
      "diastolic": 80,
      "rate": 95
      },
  "time": 1682359123.3923
}
More specific event types also involve :
Attachments that can be added to events, for example for our user to post pictures of his nutrition in a dedicated substream under his Health Profile stream.
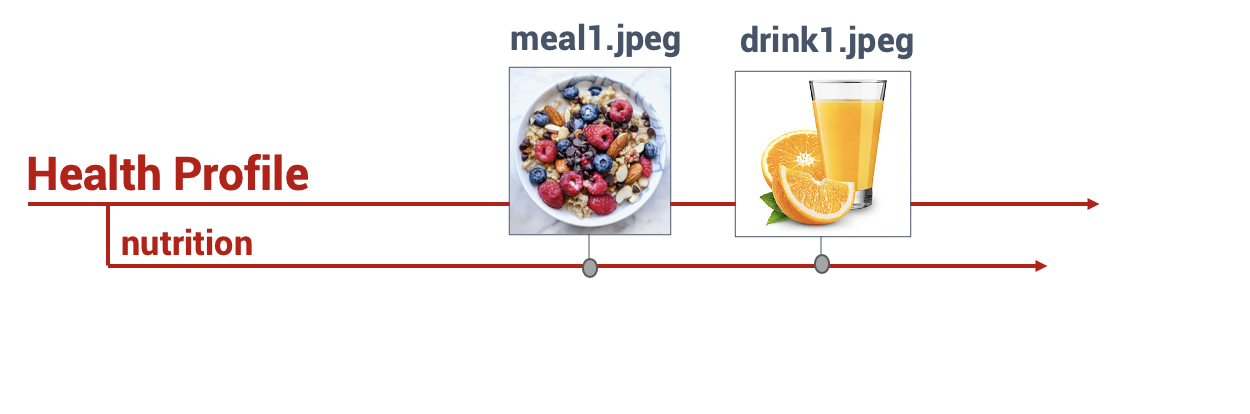
These events will have the type picture/attached :
{
  "id": "ck2bzkjdt000ze64d8u9z4pha",
  "streamIds": ["nutrition"],
  "type": "picture/attached",
  "content": null,
  "time": 1572358119.329,
  "attachments": [
    {
      "id": "ck2bzkjdt000ze64d8u9z4pha",
      "fileName": "meal1.jpg",
      "type": "image/jpeg",
      "size": 2561,
      "readToken": "ck2bzkjdt0010e64dwu4sy8fe-3yTvQTD630qVT4qBFYtWDwrQ8mb",
      "integrity": "sha256-X48E9qOokqqrvdts8nOJRJN3OWDUoyWxBf7kbu9DBPE="
    }
  ]
}
High-frequency series that can be used to collect a high volume of data. This data structure, described in the corresponding section, is used for high frequency data to resolve issues with data density. In our example, it can be used for the smartwatch to collect GPS position in real-time of the user.
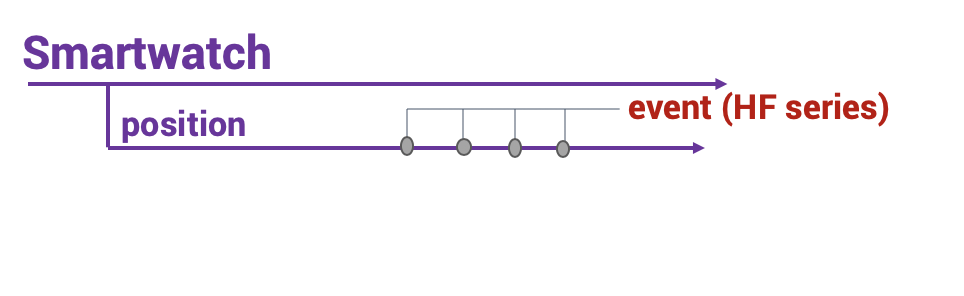
This data will have the type position/wgs84 :
{
  "id": "ck2klss8v00124yjx45s3jp5r",
  "time": 1572882785.023,
  "streamIds": ["position"],
  "type": "series:position/wgs84",
  "content": {
    "elementType": "position/wgs84",
    "fields": [
      "deltaTime",
      "latitude",
      "longitude"
    ],
  }
}
More information on HF series is provided in the API reference.
To get more details on all possible event types, see the events API reference.
Access Management
You might want to give permissions to applications and third-parties to access and manage your account (by reading or adding new data).
In a previous section, we generated a token to be able to give access to Pryv.io user account to an app or a trusted third party of our choice. This token represents the access your application has to a user account; it only expires when the user retracts his consent. This token should be stored permanently and securely in your application.
Pryv.io enables you to define accesses with different levels of permissions for third-parties to interact with your data, or only particular folders of your data.
Let’s imagine that our user wants his doctor Tom to give him feedback on his daily allergen exposure. The streams structure will then look like the following :

To do so, he needs to give permission to the doctor Tom to “read” the data from the stream Allergen exposure App and to “manage” the streams Doctor's feedback in which he will be adding his feedback, and Health Profile in which he will record events related to his patient’s health. The level “manage” will enable Tom to fully control the stream and to add his comments as new events in the stream Comment.
The access for doctor Tom will be created by a POST call on accesses (see accesses.create):
{
  "name": "For Doctor Tom",
  "permissions": [
    {
      "streamId": "allergen-exposure-app",
      "level": "read"
    },
    {
      "streamId": "health-profile",
      "level": "manage"
    },
    {
      "streamId": "doctor-feedback",
      "level": "manage"
    }
  ]
}
Thus, each access is defined by a “name”, a set of “permissions” and a “type” that is optional.
Pryv.io distinguishes between three access types (“shared”, “app” and “personal”) which are explained in the corresponding section.
As you can see from the example above, each permission specifies a streamId, the id of the stream to which we want to give access, and an access level, which can be one of the following:
read: Authorizes read-only access to the stream and its contents (sub-streams and events).contribute: Authorizes read-only access to the stream (likeread), plus adding/updating/deleting events therein. Does not authorizes modifying the streams themselves.manage: Authorizes full control of the stream and its contents.create-only: Authorizes read-only access to the stream and its sub-streams (not their events), and adding new events therein.
A more exhaustive explanation of the concept of “Access” and the different “levels” of permissions can be found in the API reference.
What is next?
This concludes our first tour of Pryv.io and some basic things you can do with it. Where to go from here?
- To implement your digital apps with Pryv.io, you can check some web app examples and tutorials on the dedicated Github repository.
- To faster your onboarding with Pryv.io, watch our video tutorials on our Youtube channel.
- Our external resources page presents some third party and unsupported libraries and sample applications.
- The API Reference explains all the calls you can make to Pryv.io and their parameters.
- To obtain your own Pryv.io installation, please get in contact with our Sales Team.